ProBlogger: Yoast: Your Complete WordPress SEO Toolkit | |
| Yoast: Your Complete WordPress SEO Toolkit Posted: 29 Aug 2016 07:00 AM PDT
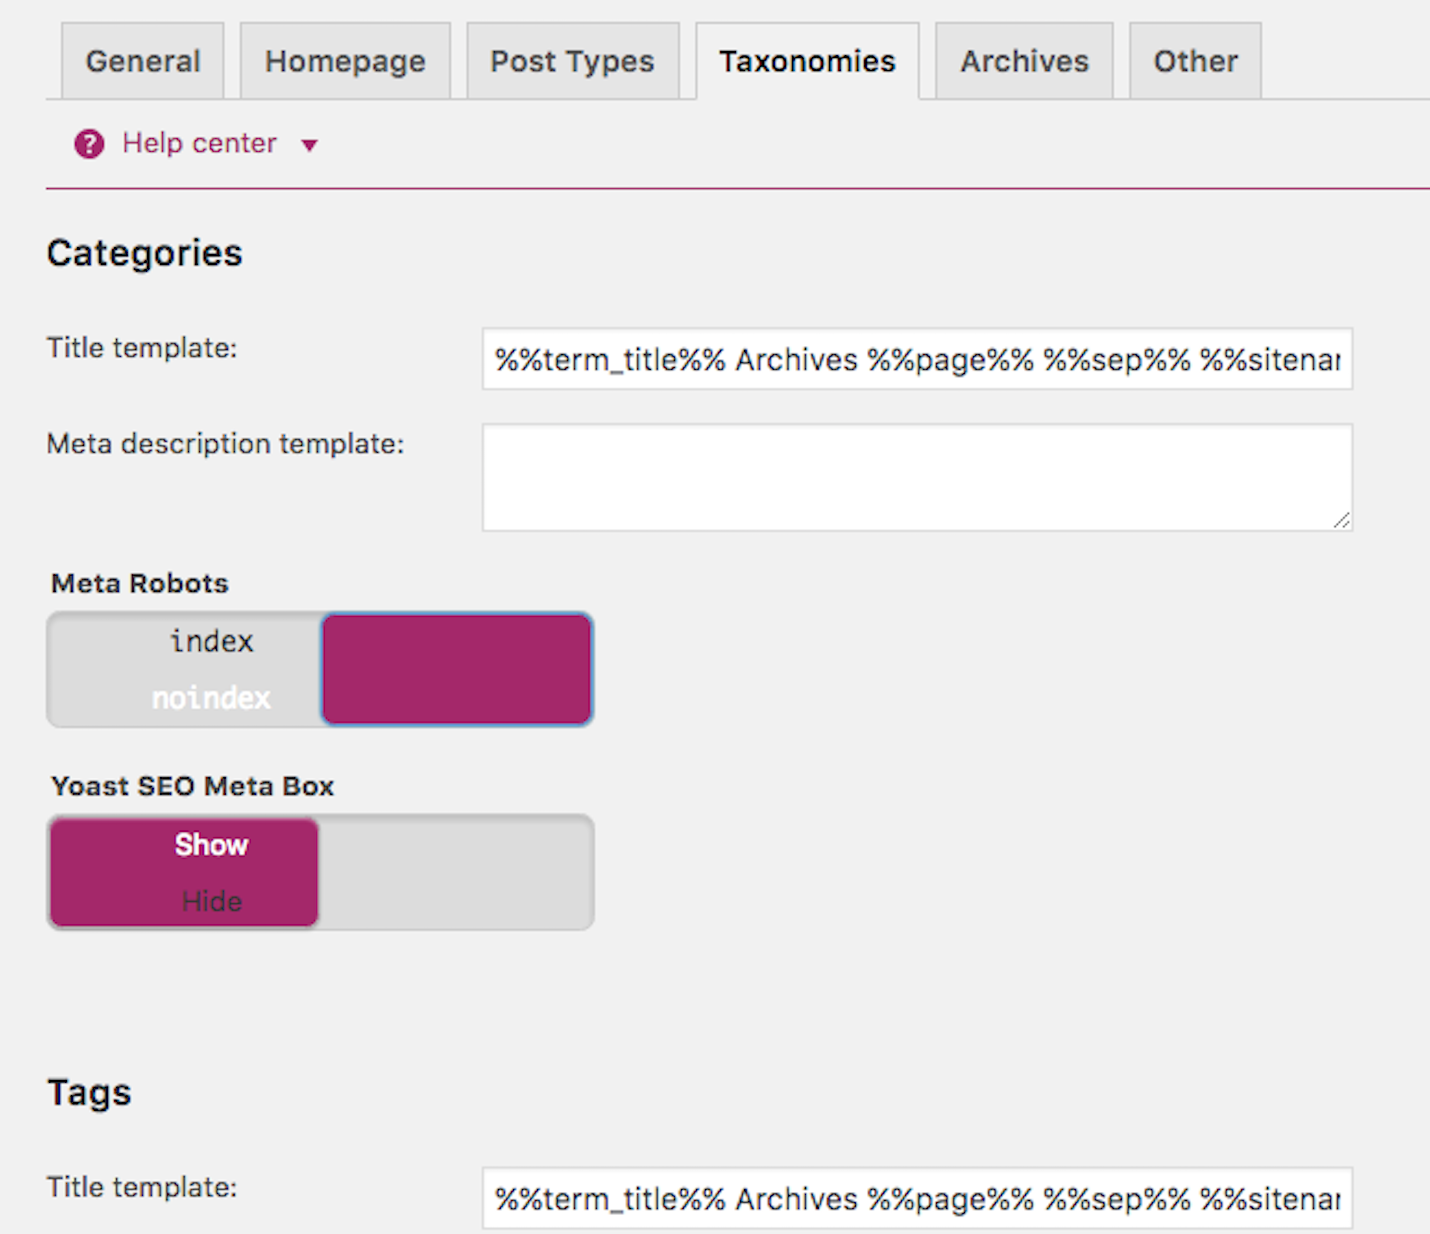
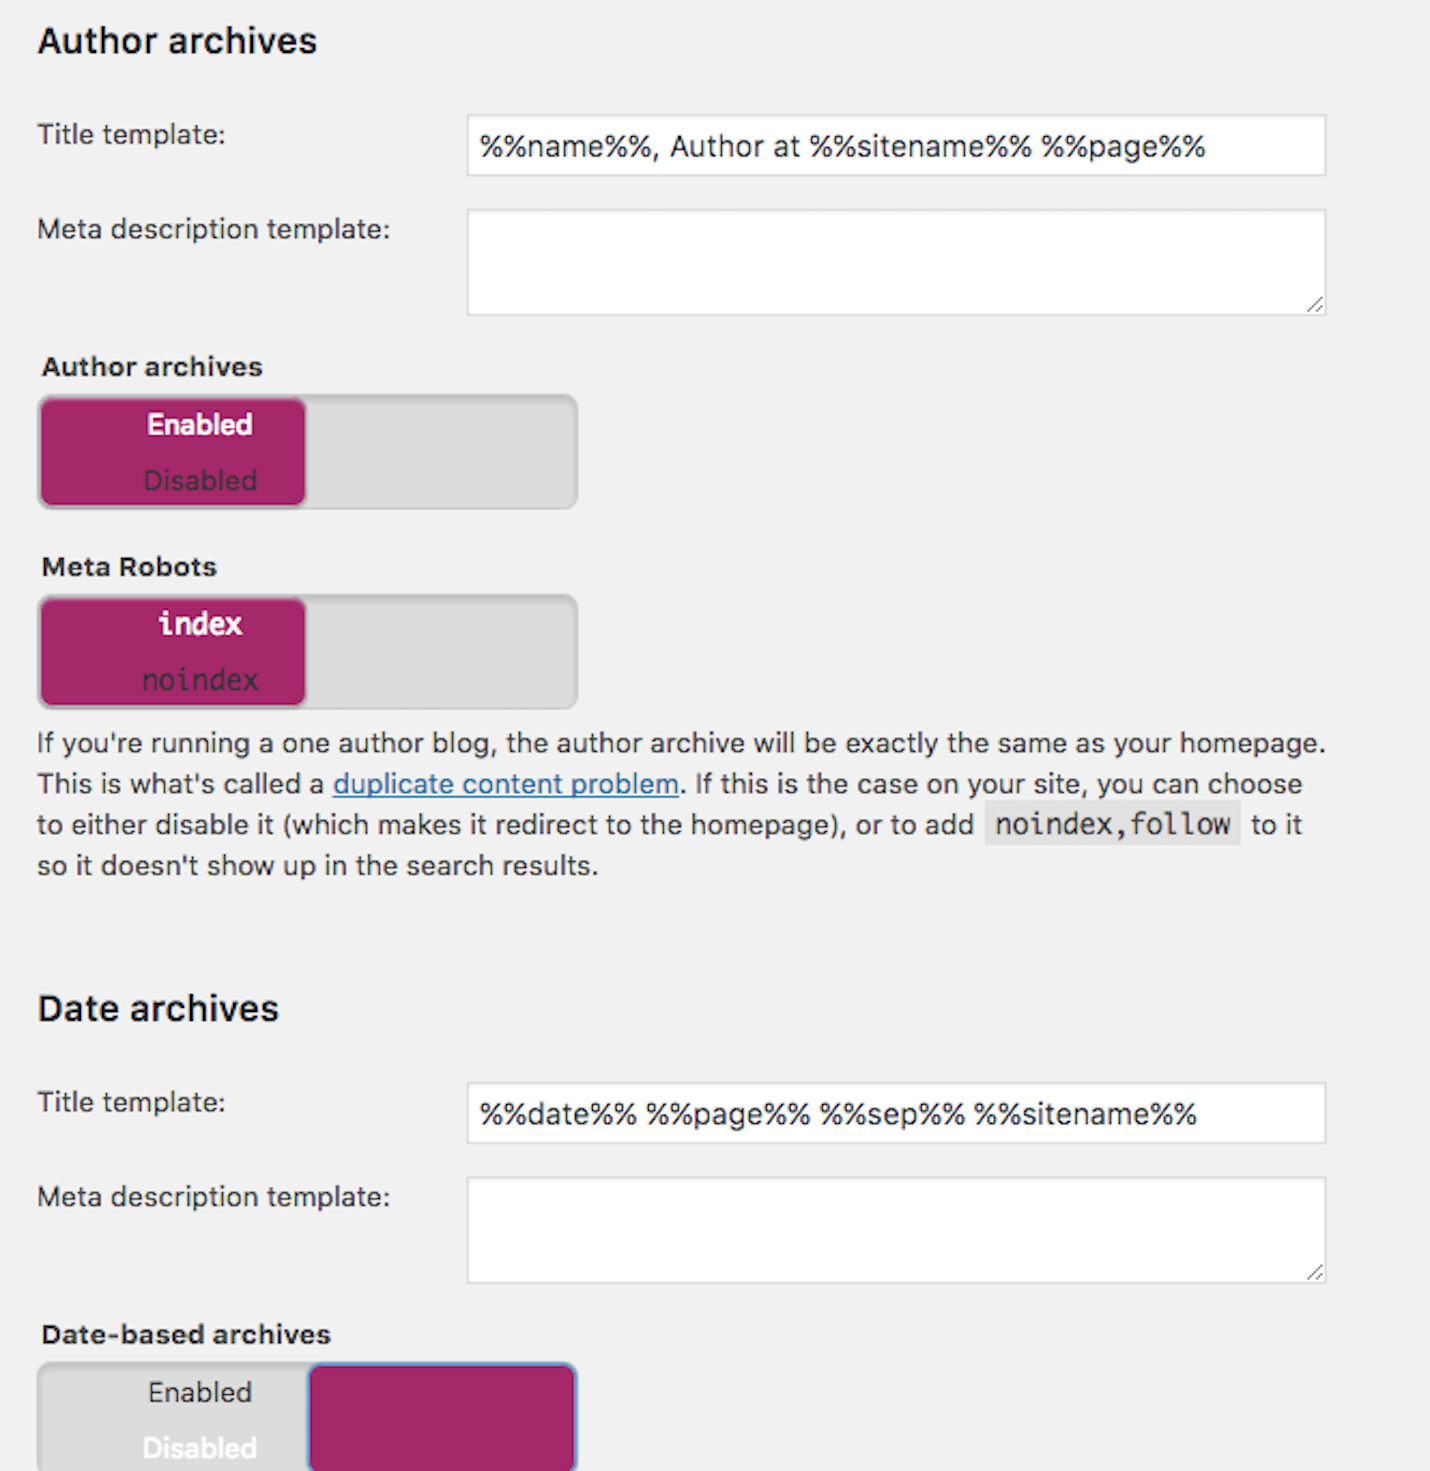
By ProBlogger SEO Expert Jim Stewart of StewArt Media. Driving your WordPress website toward a higher Google ranking involves constant tweaking, which can mean hours of detailed work. Enter Yoast SEO: the one WordPress plugin that can optimise your entire site. This comprehensive tool is the most complete SEO plugin available for WordPress, with the ability to streamline your site to increase your click through rate and ranking. Rather than spending endless hours tracking down individual problems to fix, you’ll find all your SEO functions in one compact area. You’ll have the power to make real, effective changes to your site that gives positive results. The more often you can tempt the Googlebot to crawl your site and see what it likes, the higher chance your site will rise in the rankings. Optimising your site with Yoast SEO will do just that. It’s the one SEO tool that you absolutely can’t do without. Setting Up Yoast SEOOnce downloaded and installed, you’ll need to set up Yoast SEO so it works best for your website. Every site has different needs, but creating the right settings is a relatively straightforward task. Begin with the SEO option on the dashboard menu, and then choose General. This will take you to a page that offers you general settings options for SEO. It includes a General Settings tab, which has a tour for the entire plugin if you want to see all its options. Next is Your Info, where you’ll input information about your site and your business. Next, you’ll fill out the information on the Webmaster Tools (aka Google Search Console) tab. This allows you to verify your Google Search Console or other Webmaster tools you’re planning to use with your site. The final part of this section is the Security tab. If you’re operating a single-person site, don’t worry about it. If you’re working with multiple people on one site, you might consider disabling the advanced options for other, more casual, users. Once you’ve finished the Your Info option, move down to the next one, Titles & Metas. For me this is probably the most important area of Yoast as it determines what Google can crawl & index on your site. Most bloggers sites I see have this set up incorrectly. The settings will differ slightly depending on how your site is built and what sort of blog it is but the goal is the same. Eliminate duplication. Duplication of your content can hurt your ranking efforts as Google may have difficulty understanding which page it should rank. Under Post Types, normally we would "noindex" things like media or gallery pages and some custom post types if it makes no sense for Google to index them. Similarly, forms, lightboxes, or other plugins may be generating content you don't really want or need Google to index. You can simply select noindex on those post types. The other major area to look at is the Taxonomies tab. On most sites, we would noindex categories & tags. That may be different for your site depending on how you use them, but for most they are simply duplicating what can be found elsewhere. The other section you should spend some time in and familiarise yourself with, is the sitemaps section. I'm surprised the amount of bloggers I speak to that have not submitted a sitemap to Google Search Console. I explain it all here Unless you have a multi-Author blog, noindex your Author Archives. Once again, for most sites we don't want Google crawling the archives as they are simply a duplication of content found elsewhere on the site. This, and every section after this, is very simple to fill out, while being crucial for getting the SEO correct on your site. Take the time to read each section carefully and fill out each answer thoroughly. Using Yoast SEONow that Yoast SEO is set up on your site, go to the left side menu on your dashboard and choose All Posts or All Pages, depending on which ones you want to check. You’ll see a column marked “SEO” on the right side of the screen. This column gives each page or post a score, rating its SEO “friendliness,” the likelihood that Google will like it:
This process won’t tell you exactly what each page needs for improvement, but it’s great for triage. It organises your work to tell you where you’re needed most. After a while, you will get a feel for how to write a post that is optimised well simply by following these scores. Click on an individual page to open it to the page editor, and you’ll find the Yoast SEO toolbox underneath the page’s content. Here you can customise your description tag, page title and add a "focus keyword" which will tell you how well you have optimised for it. Think of this as the SEO training area. You need to strike a balance between using your keywords whilst maintaining readability. Tweaking your site with Yoast SEO can give you incredible results, but don’t worry about turning every dot green on the entire site. Use some logic when changing your page details. Remember though, it is just a tool and your results will depend on how well you use it. Like every plugin, Yoast SEO isn’t perfect, but it’s the closest you’ll come to having an SEO professional on your staff, 24 hours a day. Jim Stewart, CEO of StewArt Media, is a recognised digital marketing expert. Jim is ProBlogger's SEO expert and will share his vast SEO knowledge to equip you with the systems and skills to optimise and monetise your blog using tried and tested techniques. What Jim doesn't know about SEO and blogging isn't worth knowing. The post Yoast: Your Complete WordPress SEO Toolkit appeared first on ProBlogger. |
| You are subscribed to email updates from ProBlogger. To stop receiving these emails, you may unsubscribe now. | Email delivery powered by Google |
| Google Inc., 1600 Amphitheatre Parkway, Mountain View, CA 94043, United States | |


